|
|
|
|||||||||||||||||||||||||||||||||||||||||||||||||||||||||||||
 |
||||||||||||||||||||||||||||||||||||||||||||||||||||||||||||||
|
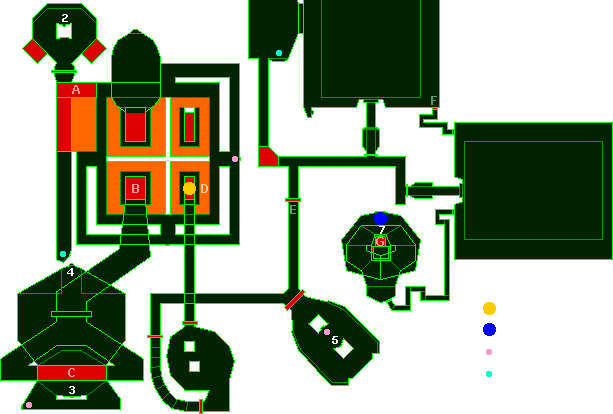
Ride it down and proceed into the corridor below. You will pass a
few doors and a stairway, and you will eventually come to a large
door facing south-east. Open it (look out for the tanks!) and use the
2x recharger if required. You must also flip switch 5 which is
located there as well. Pass door E and take a left, where you
will find a pattern buffer. Then headeast and go through the first
door you come across. Jump into the large landing bay ahead, head for
switch 6, and flip it. Run around the trench to door F
(if you're quick, you can shoot the tanks before they get in range so
you have a clear path to outrun the juggernaut - close combat here
can be very fatal indeed!). Access the small service duct this door
was concealing, and you will come to a second docking bay. Again run
along the side of the chamber until you come to a second service
duct. It leads to switch 7, which you must flip. Then climb
onto platform G and ride it to the final comm terminal.
Activate it to teleport to the next and final level, Dance The
Last Waltz With Me...  |
||||||||||||||||||||||||||||||||||||||||||||||||||||||||||||||
